In this article, you'll get a beginner-friendly, step-by-step tutorial on how to monitor your Yahoo keyword positions.
To get this out of the way early: the tutorial maps out the process by using a paid software. You can give this a spin for free using the trial (without needing a credit card), but outside of that, there isn't really a long-term reliable way to monitor Yahoo keywords for free.
Let's get started!
(Click here to skip down to the first step 👇)
Why bother monitoring Yahoo keyword positions?
Yahoo's search engine is powered by Bing, who own an estimated 6.22% market share. Not too shabby!
So does that mean Yahoo & Bing search results are identical? Well, to be honest, they're pretty similar. When it comes to variance in first page results, this study found around 2% or less variance. There was greater variance on other pages, but let's face, we mainly only care about page one.
With that in mind, I think it's worthwhile tracking Google primarily, and adding either Yahoo or Bing positions too. It's fairly safe to assume that results in both will usually be quite similar.
Use a Yahoo rank tracking tool
Let's say you've decided you want to track Yahoo rankings. I'll work with the assumption that you don't want to fork out for a dedicated tool for it.
In a perfect world, you'd use the same tool to track your Google rankings and your Yahoo rankings (and Bing, if you want) together, without additional costs. After all, the ranking factors are similar, and the process to track rankings is similar too.
I'm going to show you step-by-step how to set up Yahoo keyword monitoring user Sitechecker. The reasons why I'm recommending Sitechecker are:
- It tracks Yahoo along with Google, Bing, and Yandex
- The UI is straightforward and beginner-friendly
- It has an affordable price point
- Other features are included for no extra cost for site auditing, SEO monitoring, and more
How to track Yahoo rankings with Sitechecker
1. Start a free trial & add your first project
If you haven't already, head over to https://sitechecker.pro/rank-tracker and create an account. At the time of writing, no credit card is needed to sign up.
After signing up, the first thing to do is add a project, which you can do with the [+Project] button near the top-right corner.

You'll see a screen that looks something like this. Enter your website's domain address here.
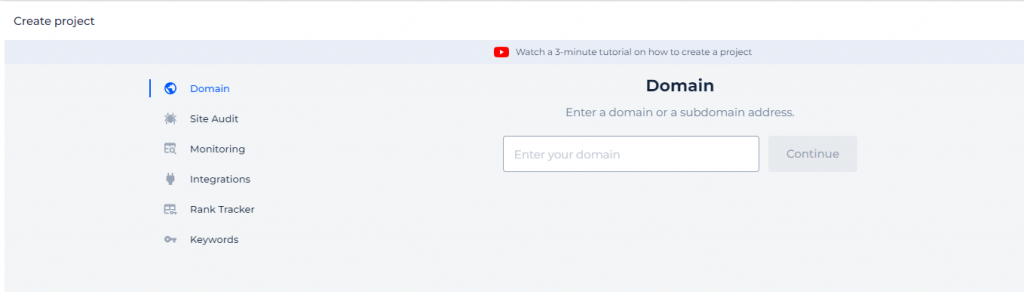
Since Sitechecker offers multiple additional features, there's a few steps that may or may not be useful for you. Let's take a look at the setup process.
2. Configure your other project settings
To get to the keyword monitoring step, there's a few others to go through first real quick.
Site audit
Before we get to rank tracking settings, Sitechecker will prompt you to configure other SEO settings too. The first step is Site Auditing. This can be useful if you haven't done any technical SEO work on your site.
Regardless of whether or not you'll use this feature, I'd recommend going with most or all of the default settings.
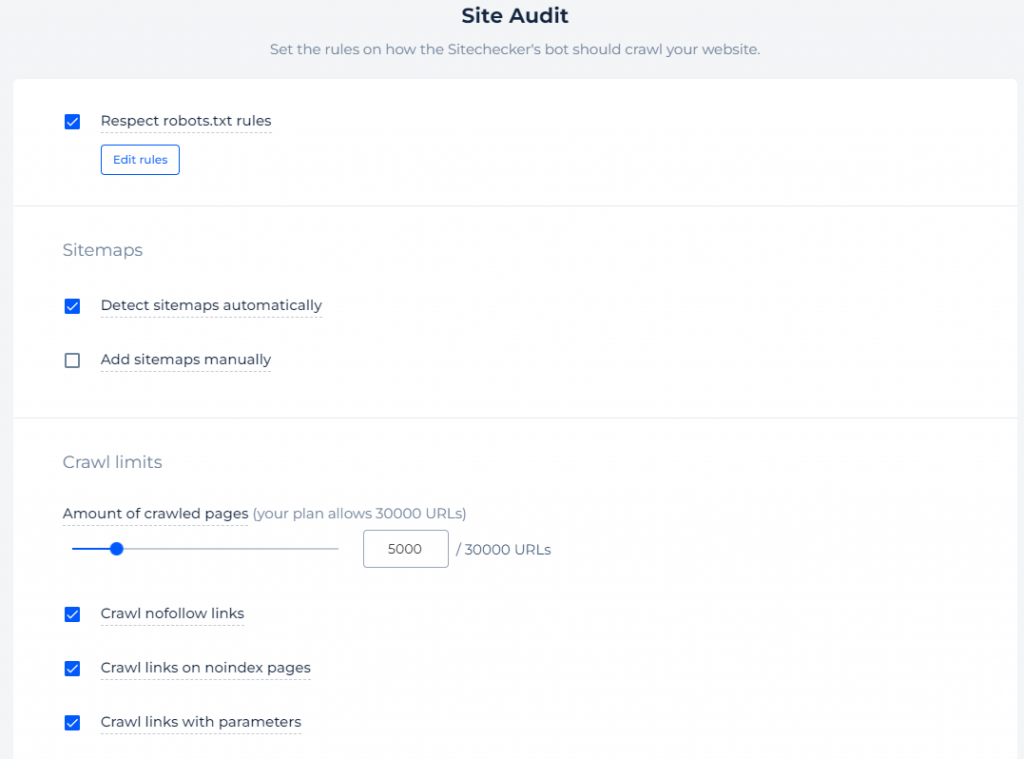
You may wish to check the ‘detect sitemaps automatically' box, and adjust the amount of crawled pages if you're planning to add multiple sites. If you're only adding one site, you may as well max out the number of crawled pages for full coverage.
SEO monitoring
This step is very straightforward. SEO monitoring keeps a record of all the changes made to your site, which is useful to analyze what happened when there's an increase or decrease in traffic, for security, and to make sure other team members aren't making unwanted changes.
The only customization available here is crawl frequency. I'd suggest going with every 12 or 24 hours.

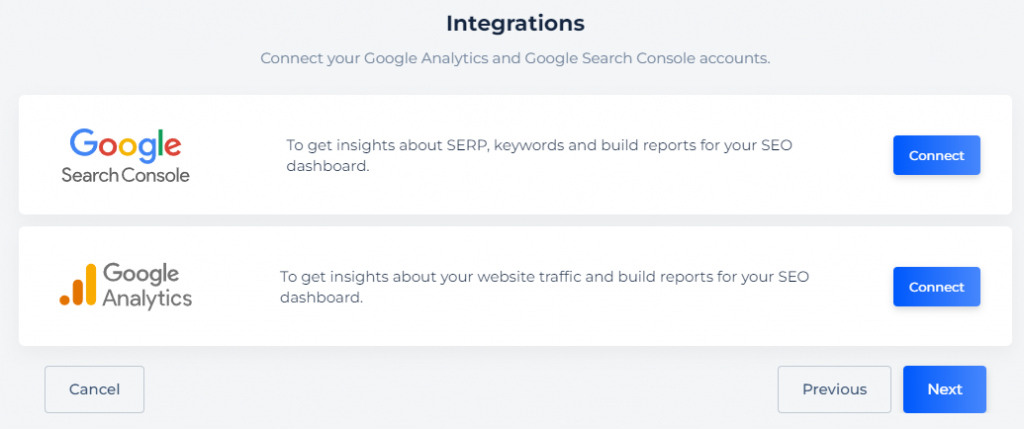
Integrations
Once again, this step isn't strictly necessary for Yahoo tracking specifically, but it's useful to analyze your site performance as a whole. Optionally, connect your Google Analytics & Google Search Console accounts to Sitechecker here.
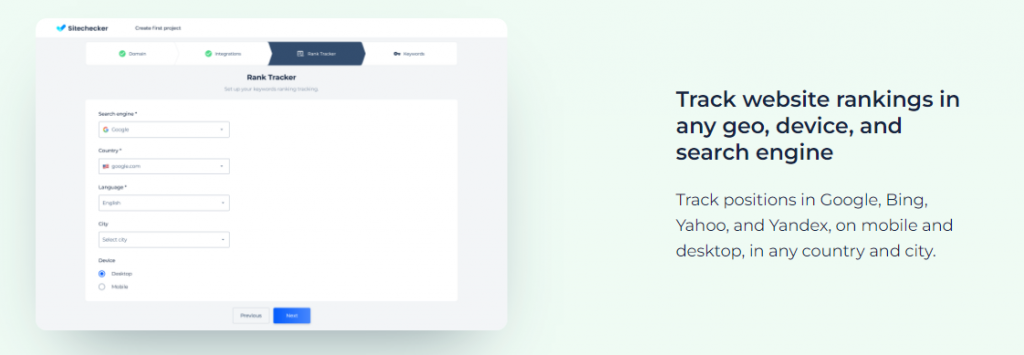
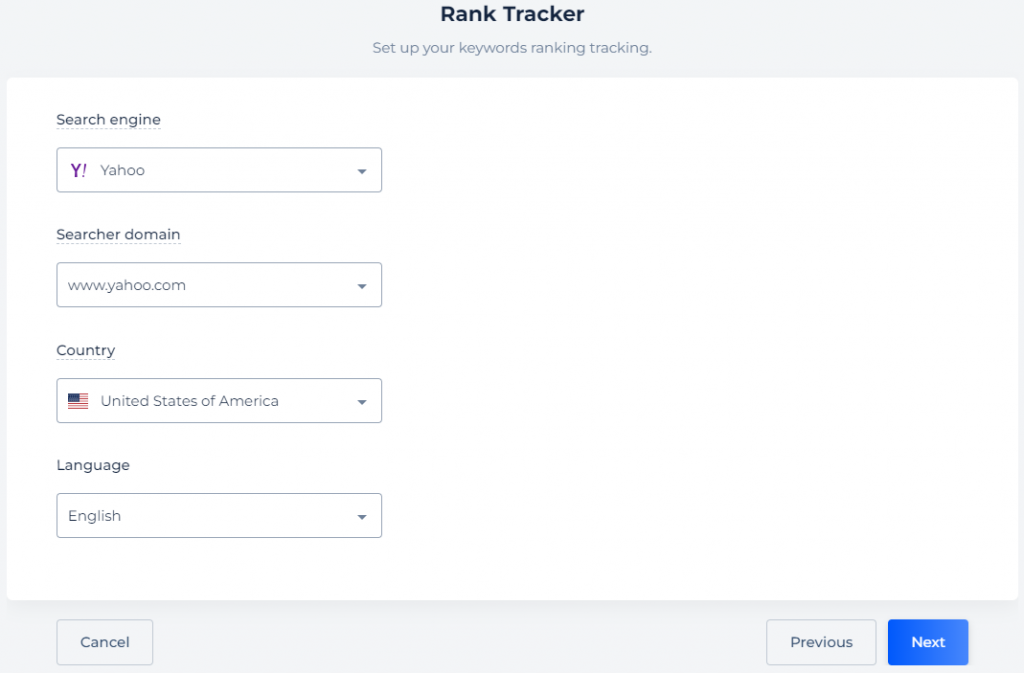
3. Select Yahoo as your target search engine
Now we've arrived at the rank tracker setup! Here, remember to change your intended search engine to Yahoo.
You can also select a target country & language here.
4. Add your target keywords
Next, you'll need to select the keywords that you wish to monitor. Sitechecker will automatically detect some keywords that you already rank for, which you can accept, and/or add your own list too.
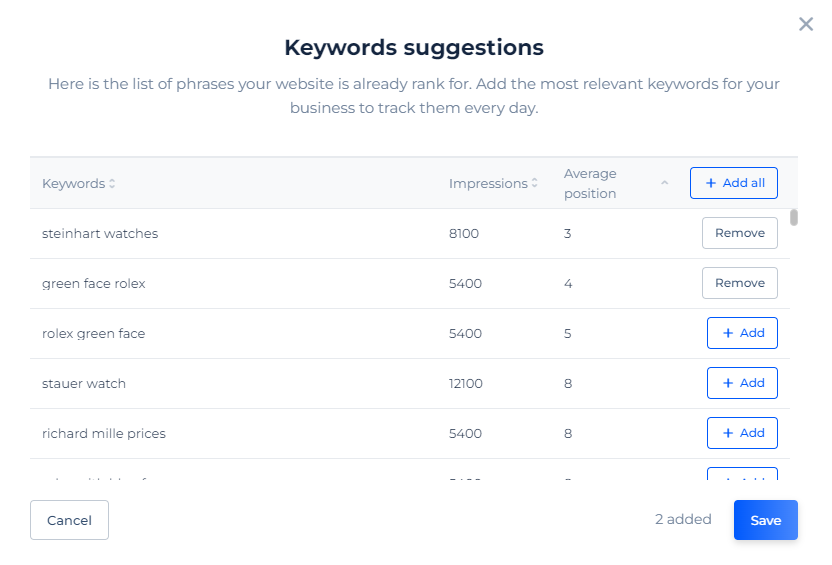
If you have a list elsewhere, you can copy/paste in bulk at this step.
Optionally, you can choose to group keywords. For example, you could choose to group based on:
- Subfolder (e.g. blog vs shop, or /en/ vs /ru/)
- Type of content (e.g. landing page vs article)
- The product or service that keyword relates to
- (etc.)
This will help in the future with analysis, as you can review performance for these groups in isolation, and see if your SEO activity is working.
And that's the initial setup done! Sitechecker will start it's audit, but you can already go ahead and click on the Rank Tracker tab in the left-side vertical menu:
It'll take a while to load, but from here onwards, Sitechecker is monitoring your Yahoo keyword positions 🙌.
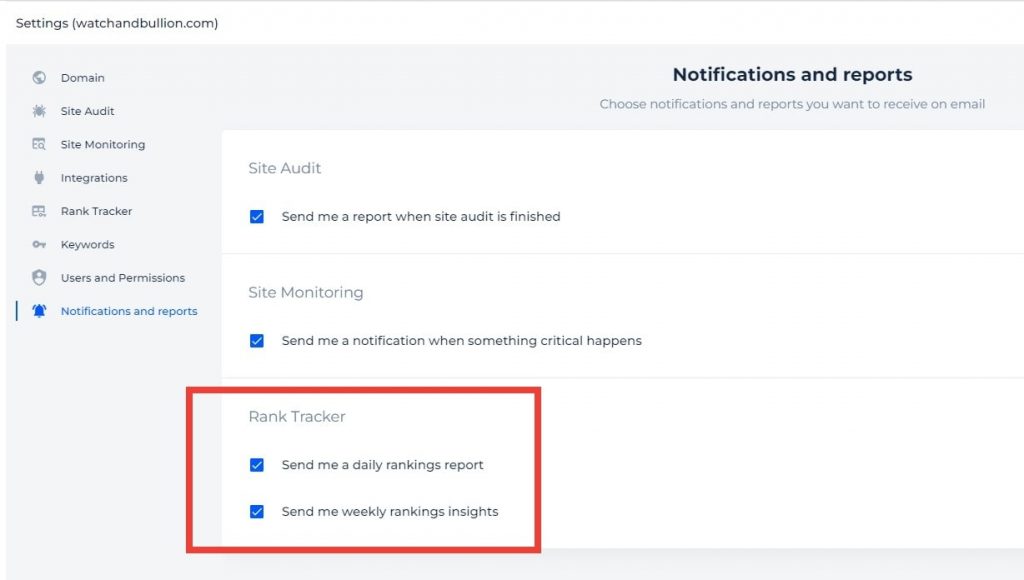
5. (Optional) get automated Yahoo keyword reports
In your project settings, you'll see a new tab has appeared named ‘Notifications and reports'. Here you can enable daily and/or weekly ranking reports to automatically come via email.
That's it! Over time, you'll be able to see a ranking history and trends for all your tracked keywords, together with helpful insights to see at a glance how your site is doing.
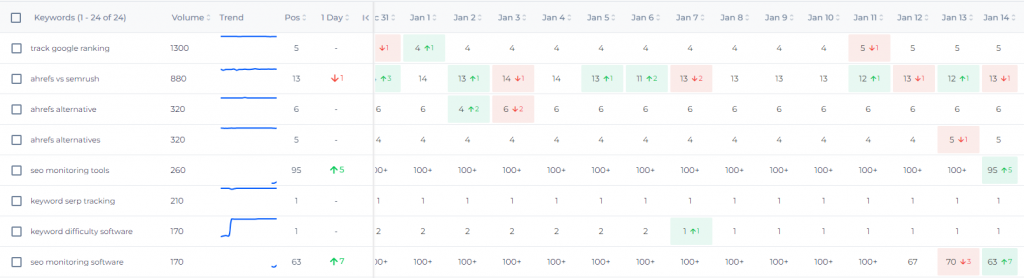
You can also click into some of the keywords to open up the SERP history, which is very useful, and not available in most SERP trackers.

I hope you found this useful. Good luck with tracking your Yahoo keywords!