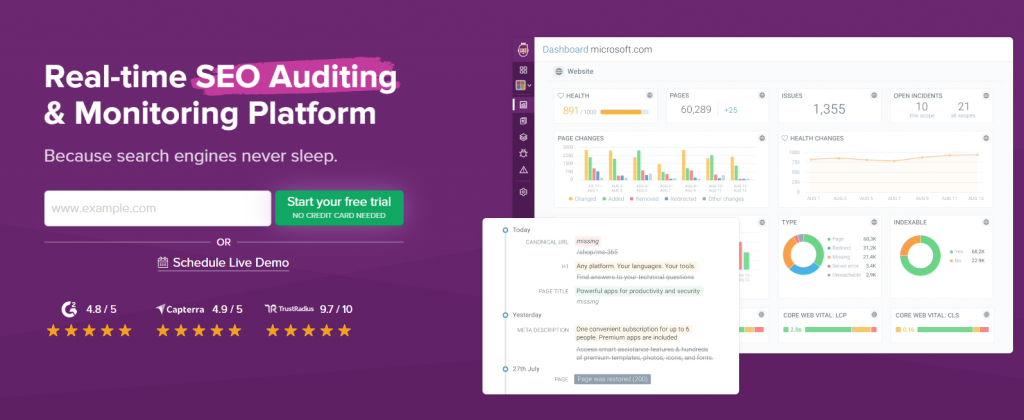
What's the point of SEO change tracking?
You've worked hard to generate a bunch of organic traffic to your site. It'd be a crying shame for it to be negatively impacted by a simple mistake, or edits from a well-meaning colleague who isn't familiar with SEO.
Tracking any website changes that could effect SEO is like an insurance policy for all the traffic you worked so hard to earn.
It helps to prevent potential drops in organic traffic caused by unwanted change.
The bigger your website is, and the more people there are working on it, the more chances there are for something to go wrong.
- A developer could release a new update that isn't SEO-friendly
- Your client might make unwanted copy changes to key pages
- Somebody could accidentally break something in your robots.txt or sitemap
- Links can break at any time
These are all examples of things you can get ahead of as an SEO, and prevent any negative impacts.
Once setup, you'll be able to:
- Track which pages have been changed, added, removed, or redirected
- Monitor the precise changes on those pages
- Get alerted of any potentially negative issues so you can take action
How to track SEO changes on your website
Before you get started, you'll need to select an SEO monitoring tool for this; it's not something that you can easily do without software.
Generally, I'd recommend two tools: either Sitechecker (good, cheaper), or ContentKing (better, more expensive). Here's a very quick overview to help you decide which might be preferable:
| Sitechecker | ContentKing | |
|---|---|---|
| Price | Cheaper (e.g. $29 for 1,500 URLs) | More expensive (e.g. $49 for 1,000 URLs) |
| SEO Monitoring | Crawls as frequently as 12-hourly, and records all changes for analysis | Constant 24/7 monitoring to get immediate feedback on every change |
| Alerts | Only for critical issues (not customizable) | Near-instant alerting of important changes (customizable) |
| Integrations | Relatively few (only Google Analytics + Search Console) | Lots (Data Studio, API, Slack, and more) |
| Other features | Sitechecker also has a good rank tracking tool included within the price, can analyze backlinks, and do technical site auditing. | Technical site auditing, but no other SEO features |
| Free trial | 7 days | 14 days |
In this post I'll demonstrate with ContentKing, because it's a better & more polished change tracking solution overall. If 12-hourly change tracking (instead of 24/7) is enough for you, and you'd like to check out a cheaper solution, try Sitechecker.
1. Create a ContentKing account and add your domain
If you haven't already, started a free trial with ContentKing. At the time of writing, you don't need to add credit card details.
Enter your domain, and follow the steps to create your account.
You'll land directly in the dashboard, and be greeted by a 7-step onboarding tou to show you around and explain the various interface aspects.
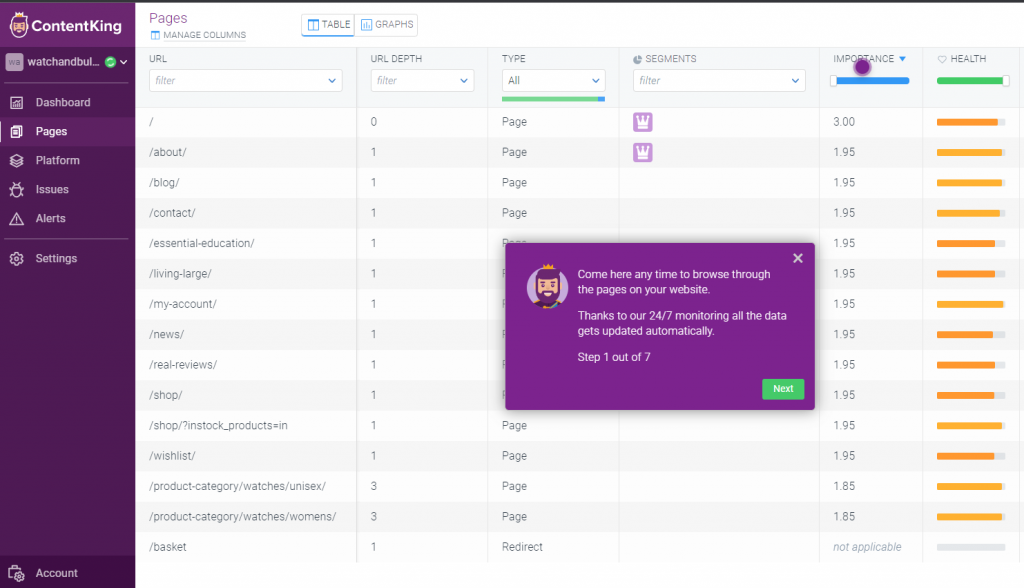
There's no code snippets to add, no plugins that are strictly necessary to connect. Technically, at this point, you've already setup SEO change tracking. Huzzah! That was easy🎉
That said, there's a few optional setup points you may wish to go through.
2. Exclude URLs you don't want to monitor
There's a good chance you don't want ContentKing to crawl your whole site. The reason for that might be as simple as saving on account usage. The lowest priced plan only gives you 1,000 pages monitored, for example, so it's important to focus on the pages you care about.
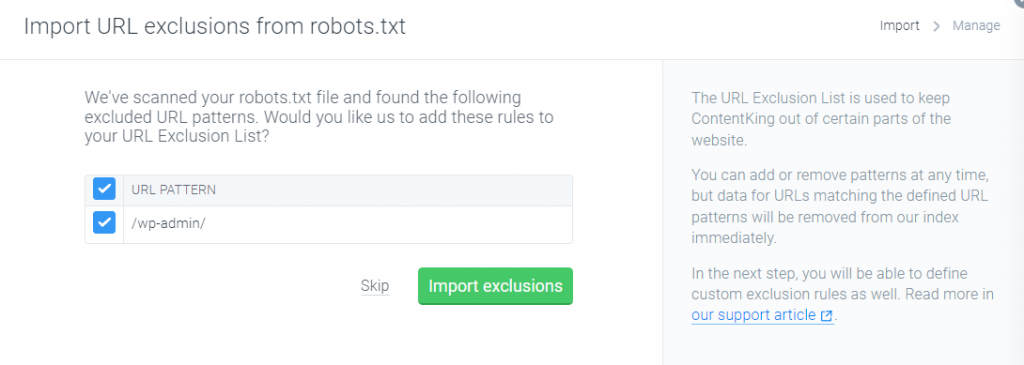
a) Import robots.txt directives if you have them
ContentKing will prompt you to to copy over any rules you already added to your robots.txt, so that ContentKing's crawler gets the same instructions.
b) Add custom rules
After this step, you'll be given the option to add additional exclusion rules too.
You might want to exclude any URL containing ?filter= or /admin/, for example. Or rather, you might want to exclude your entire /blog/ subfolder, and focus only on product pages & landing pages.
ContentKing have an excellent support article for this step here.
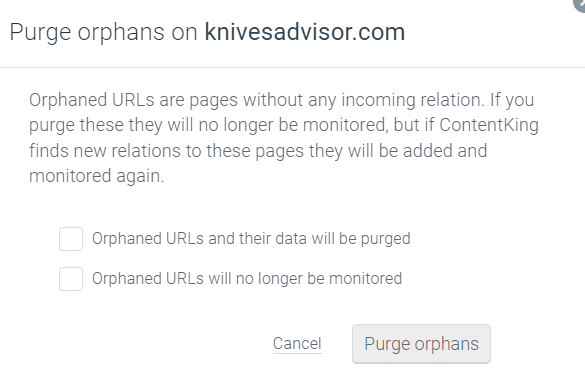
c) Purge orphan pages
Additionally, you could choose to not monitor orphan pages. If you have orphan pages and you know about them (and haven't chosen to add internal links), I'd figure you probably aren't bothered about monitoring them. May as well skip those alerts.
You can find this in Settings –> Purge orphan pages (see left vertical menu)
3. Create segments & customize your alerts
Naturally, if you have a big website, it's easy to get completely overwhelmed with alerts. ContentKing's default setup does a pretty good job of preventing this by only sending alerts they deem important.
For example, a title changing on 1 page buried deep in your site isn't so important, but 100 page titles changing (including your homepage) is something you probably want to know about. Same for a major change to your robots.txt, and so on.
The best way to customize your alerts is by setting up website segments.

In this example above, I'm creating a segment of pages for the blog. Once that's done, I can select an alert type. Let's say we chose ‘links became broken'.
I can customize this alert, choosing:
- Scope (e.g. only blog pages)
- Sensitivity (how many pages should be affected to get an alert)
- Recipients (who should get alerted)
- And messaging (how they should be alerted, e.g. Slack)
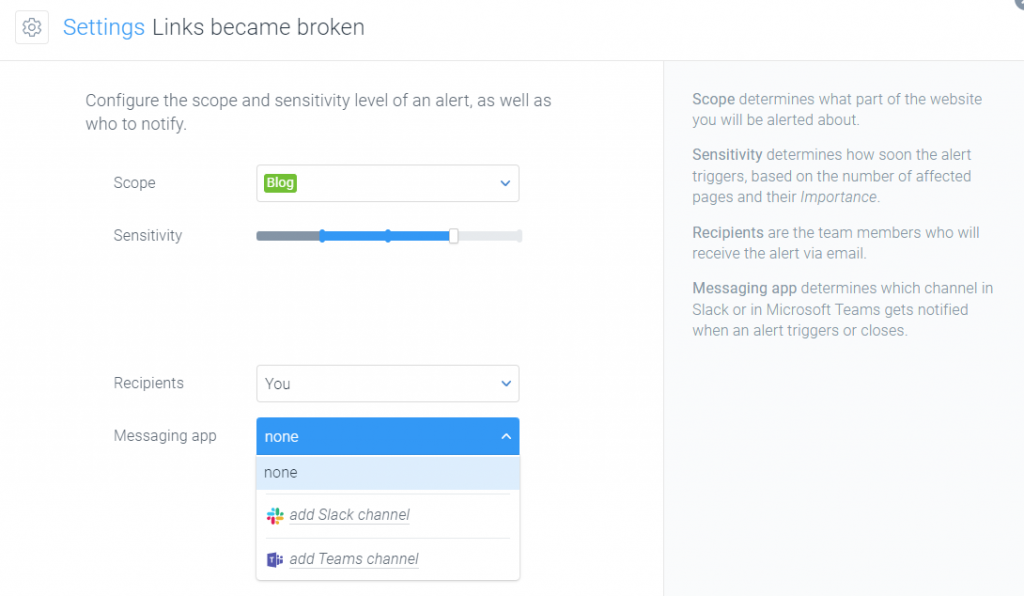
Repeat this process as you see fit for different alert types and segments of your site, depending on your priorities.
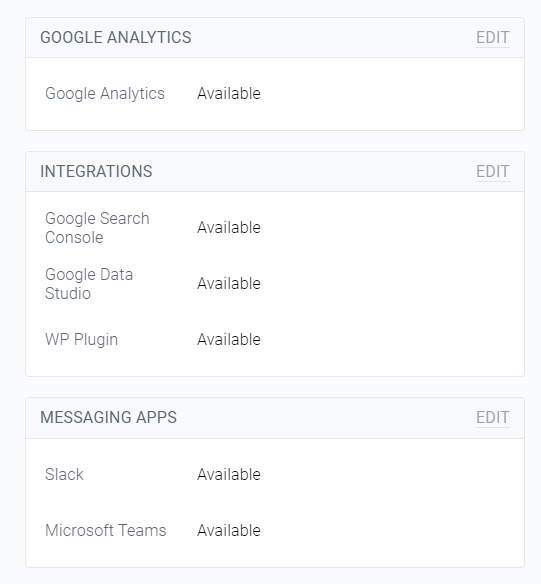
4. Configure your integrations
ContentKing does a great job of integrating with other tools in your tech stack. You can connect:
- Google Analytics
- Google Search Console
- Google Data Studio
- WordPress (via a plugin, so you can get ContentKing data directly in WordPress)
- Messaging apps (Slack or Teams)
They're quick to connect and make a big difference to your workflow. You can find this in Settings –> Integrations.
SEO change tracking is ready to go!
From here, you can keep track of all the page changes, and filter according to what you're most interested in.
After a day or two (or you can make a quick change to test this, as I did here for the screenshot!), you can head to Pages –> Tracked Changes:
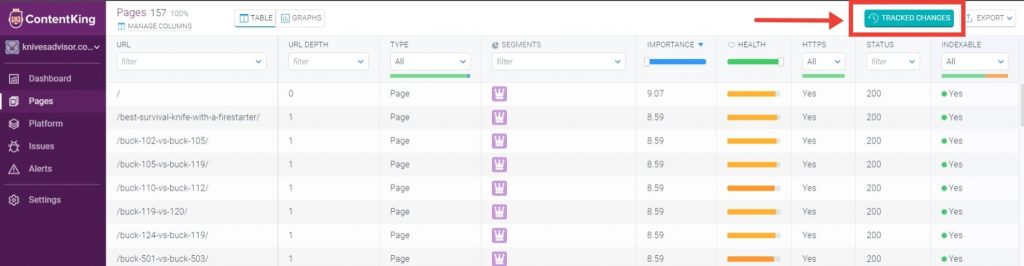
For any changes found, you can click in and see the before/after for what exactly changed (and when).